Upgrading TeslaMate is very forward and involves the two steps (and one is optional if you are brave and don’t want a backup before you upgrade).
- Backing up your VPS (Optional, but recommended)
- Downloading and updating TeslaMate
Backing up your VPS
If you followed my tutorial on installing TeslaMate on a Vultr VPS the backup process is very straight forward. If you have your VPS elsewhere, you’ll need to follow your providers documentation on how to create a backup.
Vultr includes free snapshots with their VPS’s. Snapshots are a point in time backup, on-demand backup. What that means is that you have to log into the Vultr control panel and initiate the snapshot. They also offer backups, which can be scheduled, but that is a paid feature. Backups at the current time cost 20% the price of the VPS. So if you are on the suggested $5.00 USD / month plan that means scheduled backups would cost an extra $1.00 USD / month (pretty reasonable).
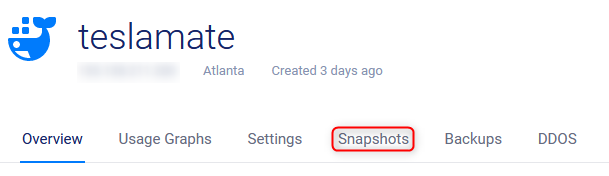
To create a snapshot you’ll log into the Vultr control panel and then click on the name of your VPS. In the top navigation links you’ll see “Snapshots”:
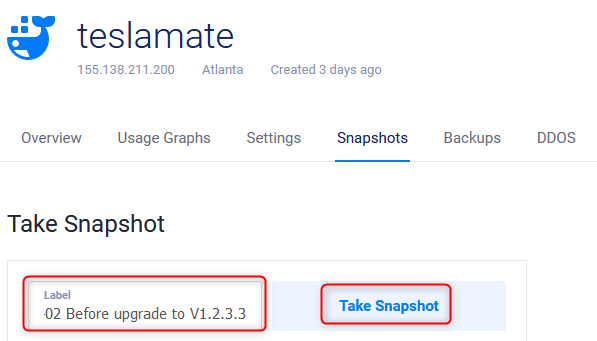
Click on the Snapshots link and you’ll be on the web page to initiate the snapshot. All you need to do is fill in the “label” field and then click “Take Snapshot”. The label is simply a name that you give to the snapshot so you can remember why you created the snapshot. Personally I name them like “2021-06-02 Before upgrade to V1.2.3.3”:
After you click the “Take Snapshot” button, you’ll see the snapshot in a “pending” status:
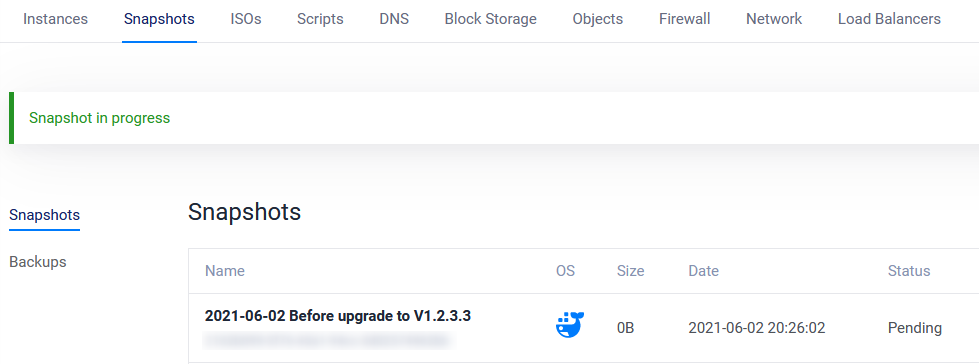
Give it a few minutes and the status of your snapshot will change from Pending to Available. You man need to refresh the web page for the status to change. After your snapshot is completed you can proceed with the update.
Downloading TeslaMate
To download the new software and update TeslaMate you’ll need to use putty (or your favorite SSH client) to SSH into your VPS. Once you SSH in you only need to run two commands:
docker-compose pull
docker-compose up -d
The first command downloads (pulls) the updated images to your VPS. The second command restarts any componets that had updates.
Here are example output from the commands:
root@teslamate:~# docker-compose pull
 Pulling database (postgres:13)…
 13: Pulling from library/postgres
 Digest: sha256:117c3ea384ce21421541515edfb11f2997b2c853d4fdd58a455b77664c1adc20
 Status: Image is up to date for postgres:13
 Pulling teslamate (teslamate/teslamate:latest)…
 latest: Pulling from teslamate/teslamate
 69692152171a: Already exists
 cb795c16a0b4: Already exists
 474563ef2115: Already exists
 da39c6823be5: Already exists
 b8d46e04774c: Pull complete
 657ba5e4412a: Pull complete
 Digest: sha256:ce4ba301ced1547bdb555997b10a99b844bb33e13953aed48827ba4e0612e7fc
 Status: Downloaded newer image for teslamate/teslamate:latest
 Pulling mosquitto (eclipse-mosquitto:2)…
 2: Pulling from library/eclipse-mosquitto
 Digest: sha256:683189aaaf01240fe4ba3c0b3262704c4a3910c7293162e22e8f43a319fc9ed8
 Status: Image is up to date for eclipse-mosquitto:2
 Pulling proxy (traefik:v2.4)…
 v2.4: Pulling from library/traefik
 Digest: sha256:08d8a7759f5fffa2441488151cedcd4d556c1f124c097f929f469c1f7b82c16f
 Status: Image is up to date for traefik:v2.4
 Pulling grafana (teslamate/grafana:latest)…
 latest: Pulling from teslamate/grafana
 Digest: sha256:10a89691416371d50c75f62c98c4b44c39de885f91b9e4bf37e3bafbc25197a9
 Status: Image is up to date for teslamate/grafana:latest
root@teslamate:~# docker-compose up -d
root_database_1 is up-to-date
root_mosquitto_1 is up-to-date
root_proxy_1 is up-to-date
root_grafana_1 is up-to-date
Recreating root_teslamate_1 …
Recreating root_teslamate_1 … doneOnce you are done running the two commands you are done updated. You can log out of SSH by typing exit and enjoy your newly updated version of TeslaMate
A self admitted tech geek. A Home Assistant enthusiast. Owner of a Tesla Model Y MSM Long Range. Get up to $1,000 off your vehicle and other exclusive benefits using my referral link: http://ts.la/frank35291