In this article, I’m going to explain how to install TeslaMate (securely) on a Vultr VPS. If you are not familiar with TeslaMate, it allows you to gather all sorts of information and statistics about your Tesla vehicle(s). The biggest difference between TeslaMate and other cloud based applications is that you are in total control of the data. You can also integrate TeslaMate with HomeAssistant to perform all sorts of interesting automations (but that’s another article)
Overview
Here are the steps that we’re going to perform:
- Prerequisites
- Create an account at Vultr.com
- Create a VPS (Virtual Private Server) with Docker and Ubuntu
- Update your domains DNS to point to your VPS
- Update Ubuntu and apply security updates
- Install TeslaMate
Prerequisites
There are a few things that you’re going to need before you can start to setting up Teslamate. The first is a domain name (and DNS). I’m not going to recommend any particular domain name provider, as there are too many. If you don’t have an existing domain, just do a quick web search and find a domain registrar that works for you. The only real requirement is that they provide DNS servers. I’ll discuss this part more after we get to the VPS setup.
The second requirement is an SSH client. An SSH client is a tool that will allow you to connect to your VPS and execute commands. Since the VPS will be Linux, it’s all command line, but I’ll provide all the commands needed. There are lots of SSH clients, but I’ve been using PuTTY for a long time, so that’s what I recommend (and will use for screenshots).
Create an account at vultr.com
The next thing that you’ll need to do is sign up for a VPS (Virtual Private Server) to run your copy of TeslaMate. There are a lot of VPS providers. I use and recommend vultr.com. In my experience, their uptime has been solid, support is good, and you can choose from 17 different locations, so you should be able to find a location that is close to you. If you use my affiliate link, you’ll get a $100 credit on your account and I get a credit on mine. The only caveat is that the credit is only good for 30 days, so it covers your first month and any playing you want to do in the first month.
Signing up is simple. You just enter your email address and password and then follow the prompts to fill in the rest of your account information.
Creating a VPS (Virtual Private Server)
Now that you have an account at Vultr, you can create the VPS that you need to run Teslamate. The VPS that I’m suggesting has a 25 GB hard drive, 1 CPU and 1 GB of memory. The cost of this VPS is $5.00 USD per month, so it’s pretty affordable.
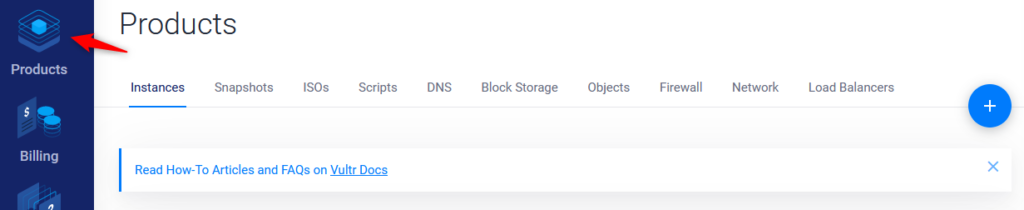
Once you are logged into Vultr.com, you’ll want to click on Products in the left hand menu:
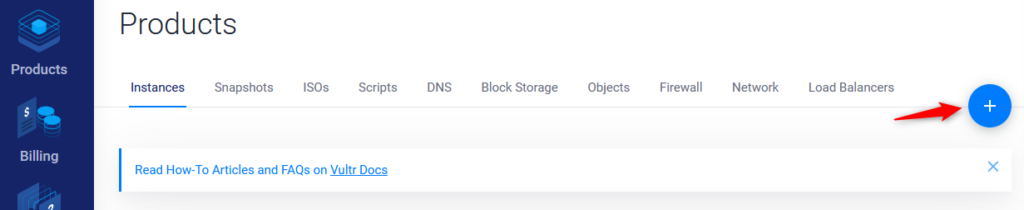
Now we can create the VPS by clicking on the blue plus icon on the right hand side:
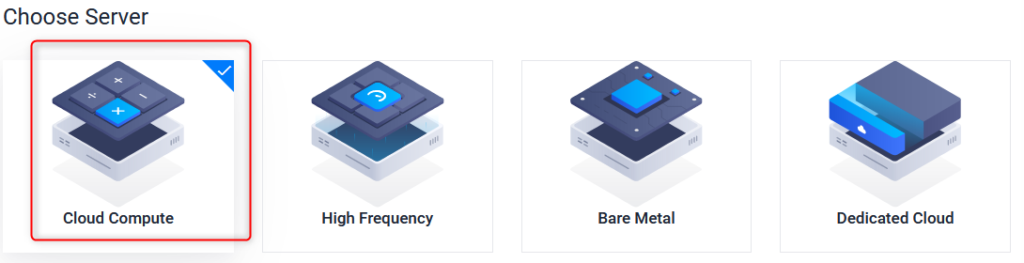
Next you’ll need to choose the type of server you’re going to create. The default is Cloud Complete and that’s what we need.
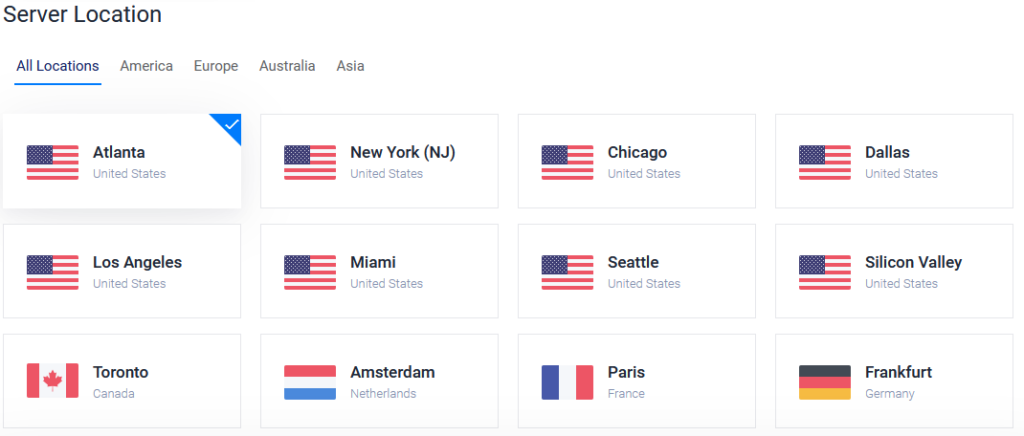
Next you’ll need to choose the location for your VPS. You can choose between America, Europe, Australia and Asia. Pick the continent that is closest to you and then pick the closest location on that continent.
Next we’re going to choose the server type. You’ll want to choose “Marketplace Apps” and then choose “Docker”. Then you’ll need to click on “Select Version” and select “Ubuntu 18.04 x86”.
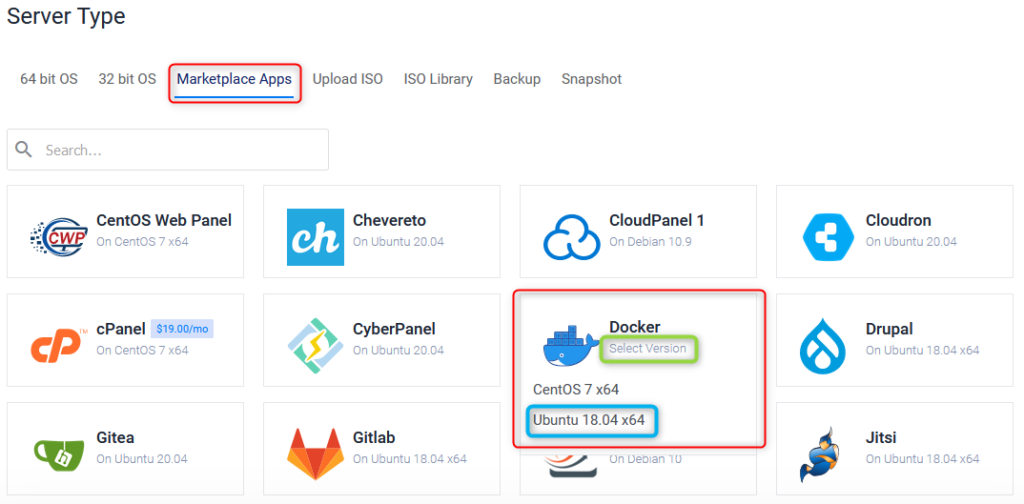
When you have that selected, it will look like this:

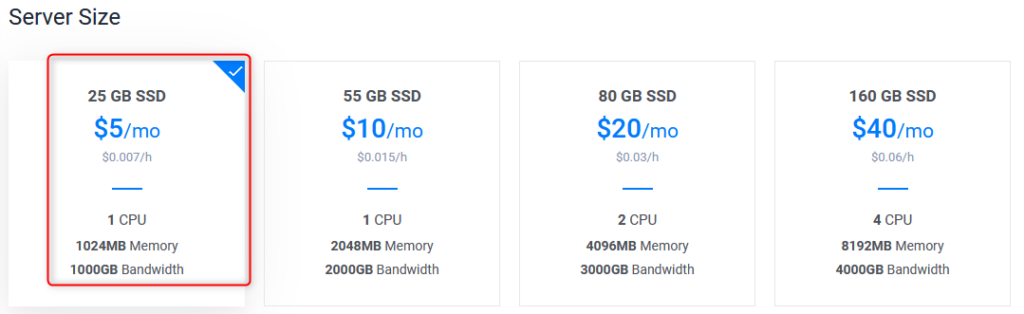
The next thing that you need to choose is the server size. The $5 USD / month VPS is more than enough to run TeslaMate:
The next you need to enter is the “host name”. This is where your domain name comes in. Let’s say your domain is “example.com”. The host name would then be something like teslamate.example.com. The hostname can be anything you like, but it can not start with a number and can not have special characters. The last item you have to fill in is the server label. This is simply a short name to identify the server within Vultr’s system (in case you decide to have multiple VPS’s).

You should now see a price at the bottom of the screen showing that your VPS will cost $5.00 USD per month. Click the blue Deploy Now button to create your VPS:

You will then go back to the Vultr Products screen where it should say “Deploying”. After a minute or so (maybe a little longer) you’ll see that your VPS been deployed:
Update your domains DNS to point to your VPS
Now that your VPS is created, you can update DNS for your domain to point a name to the VPS. You’ll need two pieces of information to create the DNS record:
- The name (in our example it was telslamate.example.com)
- The IP address of your VPS
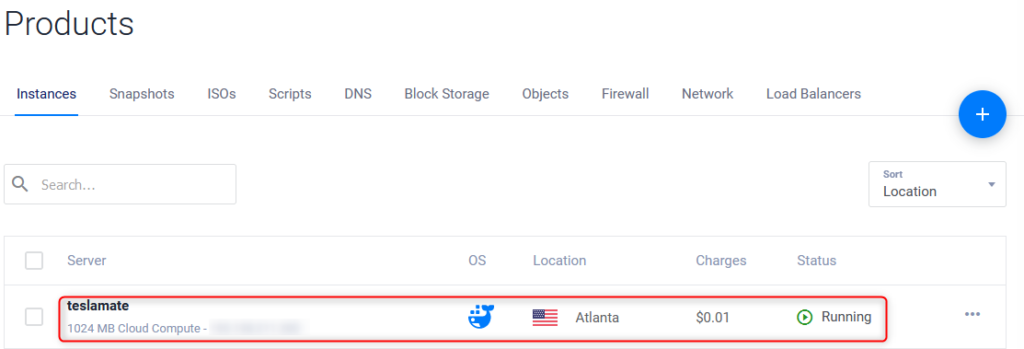
To get the IP of your VPS, you’ll need to go back to the Vultr control panel. Click on products and then click on the name of the VPS that you created.

Your IP address will be shown in the red box. I’ve obscured the IP address of my demo VPS for security.
Now that you have the name and IP address for your VPS, you can log into your domain/DNS provider and create the DNS record. You’ll want to create an “A” record; which is an “address record”. Typically, all you’ll need to enter is the name (teslamate (the hostname) in our example) and the IP address. If you require further assistance on this part, you’ll need to contact your domain/DNS provider.
Update Ubuntu and apply security updates
Now that your VPS has been created, you’ll need to log into it and apply any outstanding software and security updates. You’ll access the VPS using PuTTY (which you downloaded and installed in the prerequisites). You’ll use the Ubuntu package manager “apt” to download and install the updates. This might sound complicated, but I’ll guide you though each step.
In order to access the VPS you need two pieces of information:
- The IP address (or DNS name) for your VPS. (You should have that from the previous step)
- The root password
“root” is the administrative user on Ubuntu. Because we are going to be updating and installing things, it needs to be done as the administrative user. The root password was randomly generated when your VPS was created (but it’s easy to find). To find the root password of your VPS, you’ll need to go back to the Vultr control panel. Click on products and then click on the name of the VPS that you created. You’ll then see the password (it will be hidden). Simply click on the copy icon, then paste the password into notepad (or any text editor that you like):

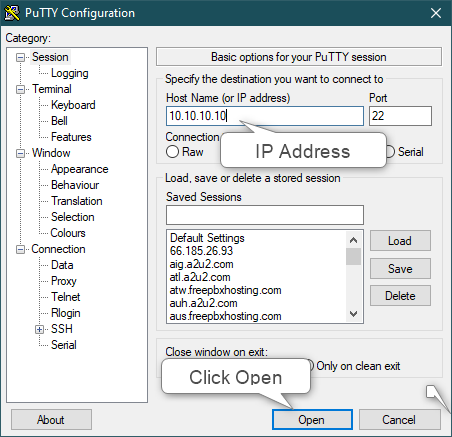
You now have all the information needed to log into your VPS. Now you need to:
- Start PuTTY
- Enter your IP address (or DNS name)
- Click Open
When you first access your VPS, you’ll get an error screen saying that your “host key” is not cached. That’s expected. Simply click “Yes” to continue.
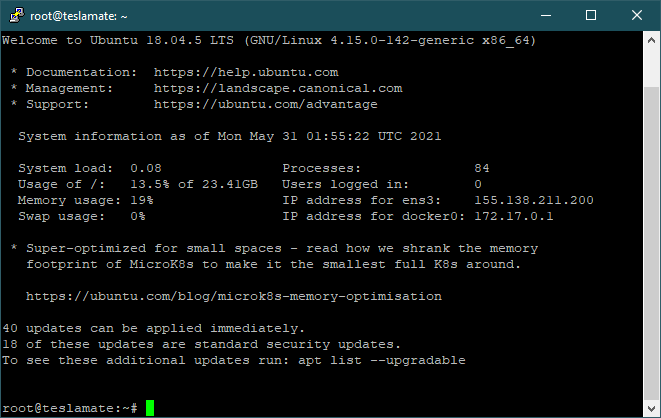
You’ll then be presented with a “login as:” prompt. Type “root” (it’s case-sensitive, and it all needs to be lower case). You’ll then be prompted for a password. Type in your password. Assuming all goes well, you’ll get a screen like this:
The next step is to make sure that all the updates and security patches have been applied. You’ll do that with the Ubuntu apt command:
apt update
apt upgrade
The apt update command downloads a list of available software and security updates. The apt upgrade command then downloads and applies the updates. apt will show you a list of any new packages as well as the packages that will be updated. Type a “Y” and then press enter to apply the updates. It will take a bit for the updates to install, but you’ll see a status bar progressing as they are applied.
After all the updates have been applied you’ll want to reboot the VPS with the following command:
reboot nowAs soon as you press enter, your SSH session will be disconnected. That’s perfectly normal. Give the VPS a minute or so and you should be able to log back in.
Install TeslaMate
Now that we have Ubuntu updated and all the security patches applied, we can install TeslaMate. The easiest way to install and maintain TeslaMate is with Docker. More specifically, you’ll be using Docker Compose for the configuration. Docker allows you to download and install pre-configured pieces of software. Teslamate is made up of several different pieces of software, which Docker allows us to easily manage:
- TeslaMate
- PostgreSQL (A relational databases to store all the data)
- Grafana (Used for the various dashboard charts and graphs)
- Mosquitto MQTT (A message broker)
With this guide you’ll also be setting up a few other programs to secure your VPS since it’s on the public Internet:
- Traefik (A reverse proxy)
- Let’s Encrypt (Free SSL certificates)
- HTTP Basic Authentication (So TeslaMate’s web interface is password protected).
You’ll need to use PuTTY again to access your VPS. Once you’re connected, you’ll install docker compose with apt command.
apt install docker-composeapt will then ask you to confirm the installation of docker-compose. Type “Y” and press enter:
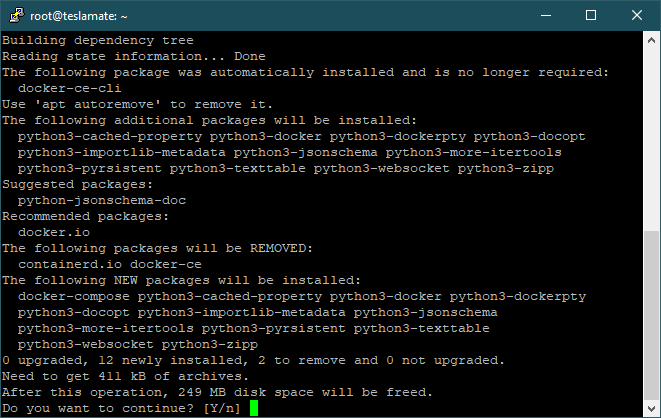
It will take a minute or so and then docker-compose will be installed.
Next you’ll need to create three configuration files:
- docker-compose.yml (This is the main configuration file)
- .env (This will contain additional configuration items)
- .htpasswd (This contains your user-id and encrypted password to log into the web interface)
You’ll work nano as a text editor for the next part as it’s very straight forward to use. You can easily cut and paste from this guide into the file you are editing. Ubuntu (and all Linux operating systems) file names are case-sensitive (unlike Windows, for example) so make sure that all file names are exactly the same as shown in this guide.
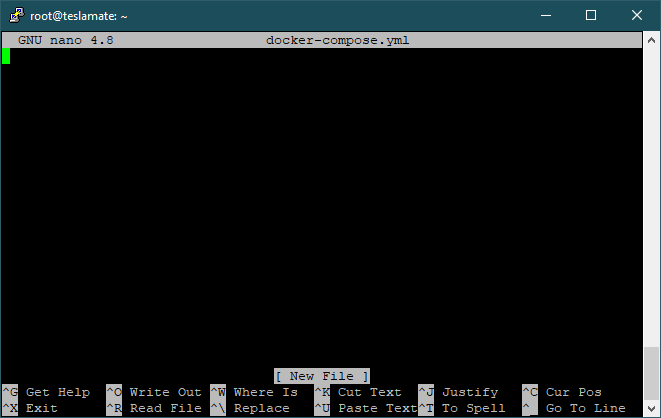
The first file you’ll create is docker-compose.yml using nano. To create the file, use this command:
nano docker-compose.ymlYour PuTTY should look like this:
Next copy and paste this code into the file:
version: "3"
 services:
   teslamate:
     image: teslamate/teslamate:latest
     restart: always
     depends_on:
       - database
     environment:
       - DATABASE_USER=${TM_DB_USER}
       - DATABASE_PASS=${TM_DB_PASS}
       - DATABASE_NAME=${TM_DB_NAME}
       - DATABASE_HOST=database
       - MQTT_HOST=mosquitto
       - VIRTUAL_HOST=${FQDN_TM}
       - CHECK_ORIGIN=true
       - TZ=${TM_TZ}
     volumes:
       - ./import:/opt/app/import
     labels:
       - "traefik.enable=true"
       - "traefik.port=4000"
       - "traefik.http.middlewares.redirect.redirectscheme.scheme=https"
       - "traefik.http.middlewares.teslamate-auth.basicauth.realm=teslamate"
       - "traefik.http.middlewares.teslamate-auth.basicauth.usersfile=/auth/.htpasswd"
       - "traefik.http.routers.teslamate-insecure.rule=Host(${FQDN_TM})"
       - "traefik.http.routers.teslamate-insecure.middlewares=redirect"
       - "traefik.http.routers.teslamate-ws.rule=Host(${FQDN_TM}) && Path(/live/websocket)"
       - "traefik.http.routers.teslamate-ws.entrypoints=websecure"
       - "traefik.http.routers.teslamate-ws.tls"
       - "traefik.http.routers.teslamate.rule=Host(${FQDN_TM})"
       - "traefik.http.routers.teslamate.middlewares=teslamate-auth"
       - "traefik.http.routers.teslamate.entrypoints=websecure"
       - "traefik.http.routers.teslamate.tls.certresolver=tmhttpchallenge"
     cap_drop:
       - all
 database:
     image: postgres:13
     restart: always
     environment:
       - POSTGRES_USER=${TM_DB_USER}
       - POSTGRES_PASSWORD=${TM_DB_PASS}
       - POSTGRES_DB=${TM_DB_NAME}
     volumes:
       - teslamate-db:/var/lib/postgresql/data
 grafana:
     image: teslamate/grafana:latest
     restart: always
     environment:
       - DATABASE_USER=${TM_DB_USER}
       - DATABASE_PASS=${TM_DB_PASS}
       - DATABASE_NAME=${TM_DB_NAME}
       - DATABASE_HOST=database
       - GRAFANA_PASSWD=${GRAFANA_PW}
       - GF_SECURITY_ADMIN_USER=${GRAFANA_USER}
       - GF_SECURITY_ADMIN_PASSWORD=${GRAFANA_PW}
       - GF_AUTH_ANONYMOUS_ENABLED=false
       - GF_SERVER_DOMAIN=${FQDN_TM}
       - GF_SERVER_ROOT_URL=%(protocol)s://%(domain)s/grafana
       - GF_SERVER_SERVE_FROM_SUB_PATH=true
 volumes:   - teslamate-grafana-data:/var/lib/grafana labels:   - "traefik.enable=true"   - "traefik.port=3000"   - "traefik.http.middlewares.redirect.redirectscheme.scheme=https"   - "traefik.http.routers.grafana-insecure.rule=Host(`${FQDN_TM}`)"   - "traefik.http.routers.grafana-insecure.middlewares=redirect"   - "traefik.http.routers.grafana.rule=Path(`/grafana`) || PathPrefix(`/grafana/`)"   - "traefik.http.routers.grafana.entrypoints=websecure"   - "traefik.http.routers.grafana.tls.certresolver=tmhttpchallenge"
 mosquitto:
     image: eclipse-mosquitto:2
     restart: always
     command: mosquitto -c /mosquitto-no-auth.conf
     ports:
       - 127.0.0.1:1883:1883
     volumes:
       - mosquitto-conf:/mosquitto/config
       - mosquitto-data:/mosquitto/data
 proxy:
     image: traefik:v2.4
     restart: always
     command:
       - "--global.sendAnonymousUsage=false"
       - "--providers.docker"
       - "--providers.docker.exposedByDefault=false"
       - "--entrypoints.web.address=:80"
       - "--entrypoints.websecure.address=:443"
       - "--certificatesresolvers.tmhttpchallenge.acme.httpchallenge=true"
       - "--certificatesresolvers.tmhttpchallenge.acme.httpchallenge.entrypoint=web"
       - "--certificatesresolvers.tmhttpchallenge.acme.email=${LETSENCRYPT_EMAIL}"
       - "--certificatesresolvers.tmhttpchallenge.acme.storage=/etc/acme/acme.json"
     ports:
       - 80:80
       - 443:443
     volumes:
       - ./.htpasswd:/auth/.htpasswd
       - ./acme/:/etc/acme/
       - /var/run/docker.sock:/var/run/docker.sock:ro
 volumes:
   teslamate-db:
   teslamate-grafana-data:
   mosquitto-conf:
   mosquitto-data:
Then press Ctrl and the X key to save the file. Nano will then prompt you to confirm the file. Type “Y” and then press enter to confirm.
The next file you’ll create is .env. Yes, the file name really does start with a period (in Linux that means it’s a hidden file). Create the file with nano using the following command:
nano .envAnd then paste in the following code:
TM_DB_USER=teslamate
TM_DB_PASS=secret
TM_DB_NAME=teslamate
GRAFANA_USER=admin
GRAFANA_PW=admin
FQDN_TM=teslamate.example.com
TM_TZ=Europe/Berlin
LETSENCRYPT_EMAIL=yourperson@example.com
You’ll need to change a few lines in this file. You can use the arrow keys on your keyboard to navigate to the different lines. Just move the cursor to the end of the line you want to change and then use the backspace key to erase the existing data. You can then type in the new values.
Lines that will need changes:
- Line 2 ( TM_DB_PASS): Change “secret” to any random characters. This will be the PostgreSQL password. It’s not something that you’ll need to re-type or remember.
- Line 6 (FQDN_TM): Change this to your DNS record name you created. In this tutorial, we called it “teslamate.example.com”
- Line 7 (TM_TZ): This is your timezone. Here is a list of Time Zone Names. If your exact city is not listed, simply find one that is close and in the same timezone as you. If this is not set correctly, all the times in TeslaMate will be off.
- Line 8 (LETSENCRYPT_EMAIL): This is your email address. let’s Encrypt will send an email this if there are any issues generating the SSL certificate for your site.
Once you have made all the changes press CTRL + X and type Y to confirm the file and then press enter.
The last file you’ll create is .htpasswd. Create the file with the following command:
nano .htpasswdThis file contains the user-name and encrypted password to access the web interface of TeslaMate. You can use this site to generate the contents of the file. Next you’ll need to enter the following information:
- Username – This is any name you want to use
- Password – This is the unencrypted password
- Mode – Set this to Bcrypt
Then click “Create .htpasswd file”. You’ll need to scroll up a bit and you’ll see the output. Here is an example output for the user “bob” and the encrypted password “maryhadalittlelamb”:
bob:$2y$10$TNboUJ7cFxIcwVkfhizsLuI8F97m55eB4pJjgNcgZav9FYuPJcu.GPlease don’t use the line above. Enter your own username and password.
Paste the line into nano and then press CTRL+X and type Y to confirm the file name and then press enter to save.
The .env file that you created above is a special file to Ubuntu (Linux). It’s read by the system when you log in to help set things up. In order to get Ubuntu to read it, you’ll need to log out of PuTTY (type exit in PuTTY and press enter) and then log back in.
At this point we can finally start TeslaMate with the following command:
docker-compose up -dIf all goes well, you’ll see a bunch of “Pull complete” (this is Docker downloading or pulling down the software needed) and then finally “Creating root_” lines like this:

Assuming all went well, you can now access TeslaMate by visiting the DNS entry you set up. In our example, that would be https://teslamate.example.com/ You’ll then get a popup in your browser like this (how it looks depends on the browser that you are using)
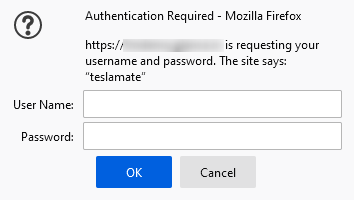
Enter the user name and password that you set up in your .htaccess file above. You will then be presented with the TeslaMate screen asking for your email address and password for your Tesla account. The screen looks like this:
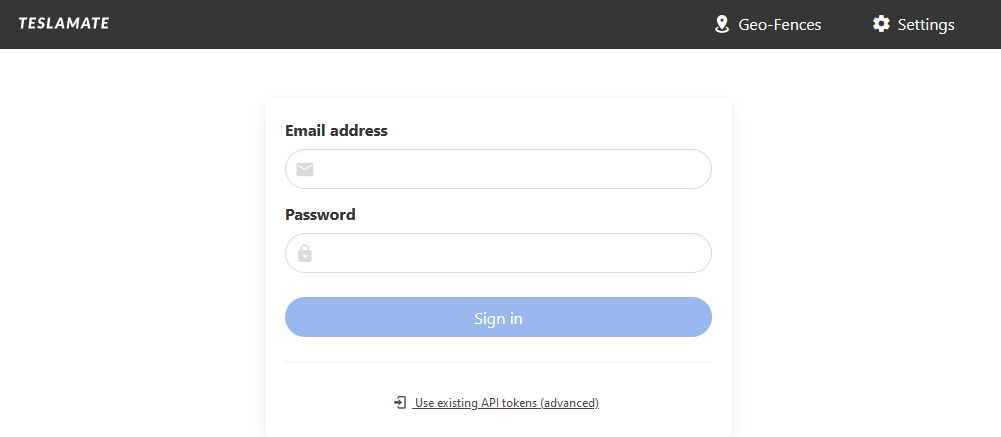
After you enter your email address and password associated with your Telsa account you’ll be prompted for your two-factor authentication (2FA) if you it that enabled (and you should, but that is another article). After your 2FA is entered (if you have it enabled) you’ll be at the TeslaMate main page.
You have now successfully installed TeslaMate. Enjoy exploring all the detailed metrics of your Tesla.
A self admitted tech geek. A Home Assistant enthusiast. Owner of a Tesla Model Y MSM Long Range. Get up to $1,000 off your vehicle and other exclusive benefits using my referral link: http://ts.la/frank35291
thanks for the only detailed instructions I could find. However, it isn’t working for me. Have the Vulture site running, everything done as instructed but no response from the teslamate.xxxx server.
How do I troubleshoot where the error lies?
I’d check a couple of things:
Also, just to verify, are you access via http or https?
Sorry, I kinda just gave up on this and hadn’t seen your reply.
Assume its traefik not running as the “docker ps” doesn’t reference that at all. I can access Grafana on the server but not teslamate, I just get ‘site can’t be reached’
And not sure if I am http or https, and where that setting is established in your instructions?
Apologies for my lack of experience in this regard, clearly not quite enough to get your detailed instructions to work!
Paul